Bristol Channel Cod – Another monster fish !

It’s ages since I’ve fished, mid-October to be exact. Work’s being keeping me way too busy for my liking. so I was hopeful that the Christmas break was hopefully going to provide a much needed opportunity to wet a line. Things weren’t going well with blankets of snow covering most of the country and temperatures well below freezing. Needless to say I stayed indoors and enjoyed the Christmas festivities with my family.

Post boxing day the weather was improving rapidly, the snow was either gone or disappearing fast and the temperatures were forecast do be a dizzy 8°C !

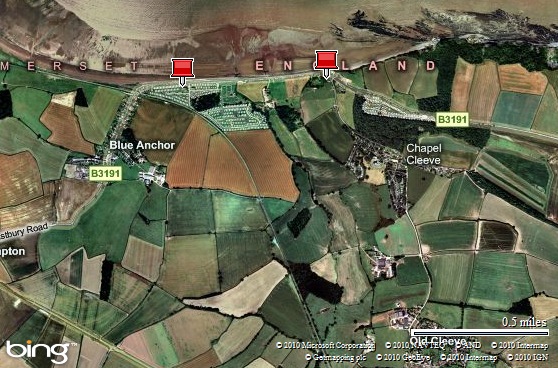
Plans were made for a two day trip to fish the Bristol Channel with my fishing mate Jim, overnighting locally at my place of work. The venue was the Blue Anchor which has produced so many good fish for me over the past two years.

DAY 1

We arrived about 7am and were soon rigged up for a 8am launch. The weather was great for this time of year, with little wind and relatively ‘warm’. The spring tides had peaked 3-4 days earlier though there was still plenty of water coming through the Channel.
We paddled out and fished the area in and around the reef, first baits hitting the bottom at 8:30am.

OLYMPUS DIGITAL CAMERA

OLYMPUS DIGITAL CAMERA

Baits were a mixture of squid, ragworm and mackerel mounted onto 6/0 pennel rigs. The fishing was pretty slow to say the least, though there was the occasional bite on each rod, nothing solid though.

The water temperature was the coldest I’ve experienced here, measuring a rather chilly 3.8°C. The cold water has certainly pushed the rays and conger into deeper water, though we persevered in the hope of a decent sized Cod.

OLYMPUS DIGITAL CAMERA

I eventually hooked into a fish, nothing large though it saved a blank!. It turned out to be a plump codling of around 2 ½ lb. It wasn’t really worth keeping so it was released to fight another day. I was soon into another fish of a similar size, though it came off at the surface.

OLYMPUS DIGITAL CAMERA
Slack water was uneventful, not a single bite until the tide turned onto the ebb and the current picked up. Despite the odd knock I failed to connect into any more fish. Though I was hardly complaining, it was a great day to be out on the water.

OLYMPUS DIGITAL CAMERA

We fished three hours on the flood and about three into the ebb with four fish between us. A lazy tide-assisted paddle back to the beach bought a close to the days session, no complaints whatsoever.

OLYMPUS DIGITAL CAMERA

DAY 2
 
It was another early start, up around 5am for a spot of breakfast prior to driving the hour or so to the Blue Anchor once more. Again, it was another misty morning, though thankfully it didn’t slow our progress too much.
 
We decided to fish further offshore in the hope of getting into some warmer water which would hopefully prove to be more productive. We paddled a couple of miles and dropped anchor. The water was deeper and as expected the current was considerably stronger, but more importantly the water was warmer, a heady 6.6°C !
 
OLYMPUS DIGITAL CAMERA

Watchet harbour is tidal and the charter/private boats can’t launch until about 2 ½ hours before high water. As we’d launched at the Blue Anchor we were on location over and hour before a boat appeared from the harbour mouth. On the reef you can generally use 4oz of weight on the flood, here in the deeper water 8oz was required.

OLYMPUS DIGITAL CAMERA

It was about three hours into the trip that something happened, something that’s never happened in my three years of kayak fishing..  I needed the toilet, badly.. and it wasn’t for a pee. This wasn’t good and situation became unbearable. I unclipped my anchor and paddled the mile to shore in record time.

On reaching the shoreline I now fully understood why I’d been listening to waves crashing against the cliffs all morning. It wasn’t good with 3-4’ swells crashing onto a steep shingle beach. I had little choice and managed to make an exciting landing, though I was dry so it was all good.

OLYMPUS DIGITAL CAMERA

Whatever the record was my getting out of a drysuit and multiple layers of clothing, I smashed it!. It was an emotional moment… say no more. Toilet paper was lacking, though there was plenty of seaweed.. again, emotional.


The launch was nasty, the waves and heavy swell causing me a lot of problems. I was stood thigh deep in water struggling to hold the kayak in the water, though I brief respite in the wave action gave me the chance to make a launch, albeit somewhat wet as I caught a set of waves once I’d started paddling. A paddled the mile back to my buoy, hooked back up and started fishing once more.

OLYMPUS DIGITAL CAMERA

The fishing was slow, though I did manage a couple of small codling around the 2lb mark. I pulled anchor and moved down tide back towards Jim and anchored up. Trouble was that I didn’t anchor successfully, the weak link had snapped and I was heading down tide at around three knots. I tied on another link and dropped anchor. That weak link broke instantly and clearly couldn’t cope with the tide run. I had no more link so tried a length of 100lb line… that snapped. Somehow I managed to tangle my loose anchor warp during the last drop so I called it quits for the day.

I called up Jim on the radio to let him know that I was heading back in. He was ecstatic, apparently he’d landed a Cod that he estimated at around 28lb!

The paddle back to shore was a rapid one, for a time I was travelling at 6.7mph with little effort!, who said that Big Games are slow ?. I arrived back at the beach and met ‘Oggy Bong’ and ‘Dizzyfish’ from the Anglers Afloat forum. Nice guys, hope to see them on the water again soon.

Jim returned to the shore a short time later sporting a huge grin. He dragged his beast out of the centre hatch, what a fish!!

OLYMPUS DIGITAL CAMERA

OLYMPUS DIGITAL CAMERA

It weighed in at a heady 26lb 3oz, and I thought my fish last year of 21lb 2oz would take a lot of beating!. Guess I’d better get back on the water and start putting some serious time in !!
I finally managed to try out my new Chota Mukluks, and they are simply fantastic. Easy to put on and take off, and they kept my feet warm enough during both days (even the drysuit legs and socks within were bone dry).

Previously, my feet would get so cold that it would stop me fishing, and walking on them would be like walking on two huge puddings. Those days are long gone, money very well spent!.

OLYMPUS DIGITAL CAMERA
The overhauled Shimano Charter reels were back in action and working well, the new drag washers being smooth and progressive.

What a great couple of days on the water, the weather was great for this time of year. I’m happy with my new gear and I was there to witness the capture of a truly cracking fish. Well done Jim !


Blue Anchor – Getting there

Blue Anchor, Somerset

Shimano Charter Special 1000 LD – Overhaul

I’ve been absolutely itching to get out and wet a line as of late, though due to a combination of work and bad weather it just hasn’t happened. That said, I hope to hit the water within the week, fingers crossed.

A good few months ago, might even be over a year now, I purchased a couple of Shimano Charter Special 1000 LD lever drag reels. One was brand new, the other was purchased locally for a great price. They retail for over £100 which is reasonable money for a reel of this design and quality. I was incredibly lucky as I picked up one as an unwanted gift for £50 and the other for considerably less!. The used reel was in excellent condition though the drag wasn’t particularly effective. When I collected the reel the drag was locked down hard. If it’d been regularly stored like this, it’d certainly have damaged the drag washer.

The original washer is a canvas type washer, though the fibre washer from a Penn HT-100 (part no. 6-5600) is virtually a direct replacement. I purchased a few of these washers from Mikes Reel Repair in the USA. They’re a great company to deal with and the parts arrived within a few days.

The whole job of replacing the drag washer and re-lubricating the reel takes an hour or so. No specialist tool were required, a couple of screwdrivers and a small adjustable spanner is all that was required. Oh, a ‘Dremel’ type tool would be advantageous, if you haven’t got one now’s the time to pester your friends!

So if you haven’t seen one before, here it is, the Shimano Charter Special 1000LD. The schematic for this reel can be found here.

OLYMPUS DIGITAL CAMERA

The first step is to strip the lever drag assembly off the reel. The cap on the lever assembly unscrews, releasing the cap and spring directly below. Beneath the cap and spring is a plastic lever shaft body which will either fall out or might need shaking out (take note of which way up it is fitted!). The drag lever can then be removed followed by the thrust washer directly behind the lever.

The polished metal lever quadrant and three screws can now be removed. You should end up with the reel as shown below.

OLYMPUS DIGITAL CAMERA

The five screws that secure the side plate can be removed, followed by the side plate itself.

OLYMPUS DIGITAL CAMERA

Note the two small blue brake blocks attached to the spool assembly. I removed them at this point as they’re highly likely to fall off and be lost at some point during the overhaul. One thing that was very apparent at this point was the lack of grease within the bearings, very disappointing.

OLYMPUS DIGITAL CAMERA

This was rectified during the overhaul process. I used a marine grade grease that wont emulsify when in contact with water. It also contains corrosion inhibitors, etc.

OLYMPUS DIGITAL CAMERA

The spool assembly slides out from the main reel body as a complete unit. Loose line makes removal a little fiddly so best to keep it taped down and out of the way.

OLYMPUS DIGITAL CAMERA

OLYMPUS DIGITAL CAMERA

Any exposed gear wheels and shafts need to be lubricated with grease !

The spool cap (with a ‘toothed’ edge) unscrews exposing the drag washer.

NOTE: it is a left hand thread. There was arrows on mine showing direction of rotation for removal. The caps on both my reels were incredibly tight resulting in my having to lightly clamp the spool in a soft-jawed vice to aid removal.

OLYMPUS DIGITAL CAMERA

The closed bearings (visible above) were removed and placed on a piece of kitchen towel. Oil placed on top of the bearing is pulled through the bearing and onto the towel. It’s a quick and effective way to get oil into this type of bearing.

The original drag washer was carefully lifted out. The replacement Penn washer has a smaller diameter centre hole. Mark the required hole diameter up with a permanent marker pen by using the old washer as a template. I used a small tapered cutting bit in a Dremel tool to open up the centre hole to the desired size. Once done it’s a simple case of fitting the new washer.

OLYMPUS DIGITAL CAMERA

The other end of the spool houses the clicker assembly. By removing the four screws the clicker assembly and main shaft can be removed. There are two further bearing housed within that require oiling.

The main reel body can also be greased at this point as required.

OLYMPUS DIGITAL CAMERA

Assembly is now the reverse of the above stripping process.

When re-inserting the spool, ensure that the cross pin is fitted and centralised. Check for correct alignment prior to lowering back into the reel body. There is a slot to align this pin to, if you hadn’t noticed this look back a few photos (Don’t forget to fit the brake blocks). The end plate and five screws can now be re-fitted.

When re-assembling the lever drag itself, place the lever arm into the ‘free spool’ position. The plastic circular lever shaft body should drop into the lever and mate up correctly into the slot.. Re-attach the cap & spring  and you should be finished.

That’s basically it. The first reel took an hour or so, the second about thirty minutes. I upgraded the drag washers in both to the Penn items and fully lubed all the bearings and level wind assembly. The handle itself can also be removed and a little oil dribbled down onto the shaft if you so wish.

That’s my Shimano reels ready for another couple of seasons.

OLYMPUS DIGITAL CAMERA

Chota Mukluk Quicklace – First impressions

If there’s one thing that I do tend to suffer with in these cold winter months it has to be freezing feet!. I normally have 3 pairs of socks on, drysuit on top, all slipped into a pair of Gul wetsuit boots. My feet tend to last 3-4 hours on a cold day at best before they get really cold. I think a lot of the problem is down to the boots filling with water when launching the kayak, or whilst sitting side saddle when fishing. Sure, the water will warm up to a degree, though it can’t be helping matters.

Over the past year or two I’ve seen a handful of UK anglers investing in a pair of Chota Mukluks. They certainly looked the part though they came with a hefty price tag, around £100 or more if memory serves me right. I don’t believe that they are sold here in the UK anymore.

Anyway, I was surfing Ebay and came across a new unused pair in the USA. They didn’t sell in the auction so I contacted the seller and a deal was struck. A week later they arrived in the UK, total cost to me was just over £80. First concern was that they were a size 13, great, just what I’d wanted. Though the penny had dropped whilst they were en-route that they were a size 13 US, hence a UK size 12. Now I normally go at least 2 sizes larger than my foot size to allow for socks, drysuit, etc.. were they going to be too small??

Out of the box first impressions were good, brand new with all the tags still attached. They’re quite heavy, though I’m comparing them to my Gul ankle boots. The soles are heavy duty and will resist sharp rocks with ease, something my thin soled Gul boots failed to do.

1

2

The main body of the boot is fleece-lined 3mm closed-cell neoprene which should hopefully prove to be very warm. The material has quite a lot of give in it which is a good thing. When I first looked at the boots I could imagine being able to get the over my calves when I was wearing my snowboarding pants with  a drysuit over the top. However, they’re easy to put on and with two pairs of thick socks there is still a good 1/2” or more of toe space remaining.

8

There’s plenty of protection for the toes and heel with rubber protection for both areas. Note the ‘quicklace’ around the ankles for improved fitting.

3

4

The sole thickness is quoted as 7mm with I have no reasons to doubt, sturdy is a good word to describe the soles. The soles also afford plenty of grip so they should prove quite effective over slippery terrain.

7

A nylon cinch strap is fitted to the top of the boot offers a good splash proof seal. The quicklace system fitted around the ankle allows for better fitting and there’s a tie point on either side of the boot to allow any loose end to be tied back out of the way.

5

6

Initial impressions are good. The build quality is superb and they appear to offer excellent insulation, plus the rugged sole should be effective on the stony/rocky areas that I tend to launch from. I’ll have the opportunity to try them out during the next 3-4 weeks so I’ll be in a good position to start providing some feedback.

DIY Rod Rack

I only keep a couple of rods in the garage, the ones that are in regular use. They’re always propped up against this and that, and it was only a matter of time until they got damaged. I was surfing the forums the other week and came across a simple solution for rod storage in the garage.

The solution was dead simple, two pieces of wood bolted bolted to the roof beams and suitably shaped to support some rods.

The size of the wooden pieces is of course entirely driven by the amount or size of rod/reel combos that you wish to store, I went for four storage slots.

For starters you needs to pieces of plywood, though chipboard would probably suffice. I used 1/4” exterior grade plywood, just in case the roof springs a leak… ok, I used what I had lying around!

w1

These were then drilled with a hole saw to produce a set of four holes on each. The board that would house the butt ends of the rods was drilled with larger diameter holes to suit.

w2

The board that will support the tip/middle sections of the rods was suitably slotted to allow the rods to be slipped into the rack.

w3

Obviously the butt ends are slipped into the other board first then the tip/middle sections are slotted into the section above.

w4

A really simple solution that allows rods to be stored quickly and safely.

w5

A short night session

I’ve hardly fished as of late for various reasons, work, family, etc, etc. I’d travelled up to the Bristol Channel on Tuesday evening, though the NE wind just didn’t ease off as forecasted. I waited around for an hour and finally called it quits and drove back home. Typical though, by the time I’d driven an hour home the wind had dropped to barely a whisper !

The weather for Thursday was looking very favourable with light NE winds forecast (again). I checked the live weather before I set of and it was showing 4-5mph. Clearly the weather station is behind a fence as the wind was a steady 12-15mph on my arrival. I decided to rig and and wait it out. By 8pm it had eased sufficiently for me to launch so I headed down to the beach and readied myself to launch.

OLYMPUS DIGITAL CAMERA

Once I was 300-400m out it became apparent that the sea was somewhat choppier than expected with most waves coming over the front hatch. I found myself requiring the constant use of my head torch to allow me to anticipate the waves as they came towards me. I eventually anchored up and settled down to some fishing. Despite the use of my drogue, the wind and waves had me swung 90 degrees across the tide. As the tide eased I was almost 180 degrees to the tide. Sure, I could have anchored from the front, though with conger eel expected I wanted to keep the anchor warp well out of the way.

Baits were squid and mackerel mounted to 6/0 pennel rigs with a 100lb nylon trace. It was about a 20 minute wait before the first fish of the evening, a reasonable sized eel that went well in the tide.

OLYMPUS DIGITAL CAMERA

Several more fished followed throughout the session, I ended up with five eels from about 8lb, the best being somewhere around 15-20lb.

OLYMPUS DIGITAL CAMERA

The mackerel bait saw very little action with only the odd knock here and there. I did eventually manage a single dogfish.

OLYMPUS DIGITAL CAMERA

The weather was quite difficult throughout the evening with the wind varying from a light breeze to a fairly stiff wind at times. As midnight approached the wind lifted considerably and I didn’t fancy a difficult recovery at night so I decided to called an end to the session. It was good to dust the cobwebs off my gear, hopefully I’ll be hitting the water again within the week.

Galloway & the Rhins

After last years fairly successful trip to south west Scotland it was decided to organise another trip for 2010. Plans were made fairly early on in the year with the same caravan park being used and the same venues to be tackled once more, with a few extra possibilities also being given some serious consideration. The good thing about this area is that there’s normally some shelter to be had regardless of wind direction.

The journey from Hampshire to the caravan park is a 450 mile trip which takes approximately eight hours.

28
31
I travelled up with Andy and we decided to take a scenic detour along the way in order to travel through the Galloway Forest Park.

linewebmap2
The area is quite stunning and well worth the extra hour or so it takes to travel through the centre of the park. On a good day you can see red deer and wild goats, however, we weren’t that lucky on the day.

34
33
35
We arrived mid-afternoon and took a drive over to the Mull of Galloway just for a look around and to stretch our legs after the long journey. The wind was fresh and the bay was whipped up into white horses. We walked around the Mull to check out a few potential fishing marks and launch sites.

36
Due to the weather we enjoyed a quiet evening in the pub. The next morning saw a firm south westerly wind so we fished the shelter East Tarbet in order to gather some mackerel for bait. Last year the mackerel were plentiful and I enjoyed a full string of fish most drops, however, this year couldn’t have been more different and the fishing was extremely hard work.

OLYMPUS DIGITAL CAMERA

OLYMPUS DIGITAL CAMERA
However a few mackerel were eventually caught and as the wind had eased off we headed over the Ardwell Bay to try for some pollack.

OLYMPUS DIGITAL CAMERA
Last year I drifted along the cliffs at the north end of the bay with great success. It had appeared that there had been a sharp ledge just offshore rising from 13-5m. I seemed unable to find it this trip though I eventually realised that was was drifting towards the cliffs at a ‘snails pace’ so the fishfinder showed a much slower rise in the seabed compared to what it shown on the display when drifting over the same mark at a much greater speed. As the fishfinder sounds at a fixed rate, a different drift speed can produce a very different display, a good lesson learned.

Again, the fishing seemed very very slow compared to the previous year, conditions didn’t seem that different, just the way it goes I guess. We did eventually find some fish with a good number of pollack coming to the kayaks. Some Launce (Greater Sandeel) and Gurnard were thrown in for good measure.

OLYMPUS DIGITAL CAMERA

The fish weren’t huge with the average running between 1-2lb. There was the odd better fish at around 5lb, though these were caught by ledgering a large strip of mackerel tight to the bottom.

OLYMPUS DIGITAL CAMERA
What there was this year was huge amounts of jellyfish covering the beaches when exposed at low water. I’ve seen this before in previous years, at times they can be there in plague proportions.

OLYMPUS DIGITAL CAMERA
What we did struggle with, continuously, was the poor weather. Strong winds day and night plagued us during the trip, to make matters worse they were actually forecast to increase in strength as the remainder of the week progressed. The highs winds (often 20-30mph) were proving very restricting in where we could fish. The geography of the area would normally provide some shelter, though the high winds were proving too much for even this venue.

We fished East Tarbet once more fishing close in with baited feathers in an attempt to catch some more species. A selection of Launce, Gurnard, Whiting and Sandeel were caught bringing the species count for for three days to eight.

OLYMPUS DIGITAL CAMERA

OLYMPUS DIGITAL CAMERA
At one spot I fished I encountered large amounts of tiny Whiting within a second of hitting bottom. This was amusing to begin with though the novelty factor was wearing thin after a few minutes!

OLYMPUS DIGITAL CAMERA
The bad weather was preventing us from hitting the Tope marks, as well as some deep water pollack marks which we’d planned to fish. The weeks trip was cut short after only three days due to the deteriorating weather. Calling an early end to the trip was a difficult decision, though with the poor weather there was proving to be little enjoyment at times and it was only going to get worse had we stayed.

I’d like to fish there again next year, though I’ll keep any future trip on a short notice basis, taking the tent if required.