Florida Bass fishing!

I wont write much of anything about this trip, though it was quite simply an experience!!. It consisted of fishing from a small, well laden, skiff best suit to two anglers… there were three of us. We set off in pitch dark and navigated down a heavily overgrown channel by headlamp, the combination of overhanging trees, vines and a narrow winding channel was interesting!. The skiff felt rather tippy, though after an hour or so I had a feel for it. There was the added hazard of large Snake Birds falling from the trees into the water as you motored by… again, interesting!. Oh, let’s not forget the crocodiles!.

The fishing commenced with trying for some Snook over some disturbed water, I think I was in on my second cast!. We moved up and down this large drainage channel and fish for Bass and Snook, casting towards to odd rolling Tarpon. Quite a few fish were caught between the three of us, I might have had more, though my casting accuracy was causing issues"!. Anyway, the location was secret hence the lack of info and I’ve been choosey as to what pictures I’ve posted.


HookSIG

Florida flashbacks!

I didn’t get around to documenting every fishing trip during my recent holiday to Florida, there was simply too much going on over the week!. Below are some images from an early morning flats trip (they were all early!). The fishing was particularly hard that day though I managed to save the dreaded blank.

It was interesting that whilst paddling down a narrow channel to the sea there were several buoys along the edge of the channel. By the time we returned the water levels had dropped reveal a set of crab traps. Some had some rather feisty critters inside, just looking up close had them jumping and snapping!

OLYMPUS DIGITAL CAMERA

OLYMPUS DIGITAL CAMERA

OLYMPUS DIGITAL CAMERA

OLYMPUS DIGITAL CAMERA

OLYMPUS DIGITAL CAMERA

Hobie Outback rudder upgrade

It’s fairly common knowledge that upgrading the rudder on the Hobie Outback is a worthwhile modification. The rudder is simply removed with a cross point screwdriver as it is held in place with six stainless screws. The upgrade involves fitting the Sailing Rudder.

OLYMPUS DIGITAL CAMERA  OLYMPUS DIGITAL CAMERA

With the six screws removed the blade is detached from the rudder mechanism, it’s as simple as that!.

OLYMPUS DIGITAL CAMERA

When I visited the HobieCat centre in Poole they didn’t have a sailing rudder in stock at that point in time, though one could have been ordered in. What they did have though was a sailing rudder that’d been removed from a Tandem Island as they’d recently been upgraded.

This rudder is larger than the Sailing Rudder, yet it is still a direct swap for the original factory rudder. See the photos below for a comparison.

OLYMPUS DIGITAL CAMERA  rudder2 

                       Standard Rudder                                             Sailing Rudder

OLYMPUS DIGITAL CAMERA

Tandem Island Rudder

Despite being somewhat heavier than the standard factory fit rudder, it can still be raised and lowered without undue effort. It should be highly responsive and be able to maintain good contact whilst navigating choppier water. I’ve yet to test it afloat, though I’ll provide some feedback once this setup has been thoroughly trialled.

FOLLOW UP REPORT 06/03/13

I decided quite early on that the TI rudder was just too heavy for the rudder mechanism. I didn’t like the creaks and groans when raising and lowering the rudder. I recently swapped the rudder over to Hobie’s Large ‘sailing rudder’ which is a nice compromise between the standard and TI rudder (see photo below) and has no overloading effects on the rudder controls.

P3040967[5]

Pro Angler 12 for the Hobie Championships

I’m looking forward to getting afloat in Hobie’s new Pro Angler 12 at the Hobie World Championships in Texas next month. The factory is currently producing a run of fully rigged identical kayaks for the event and they look cracking!

Getting the kayaks ready..
Check out these rigged PA12’s

Hobie World Championships – Team GB

I received a phone call from the Hobie centre this afternoon offering me a place to compete in the Hobie Fishing World Championships in Texas next month. Needless to say the decision making process could have been measured in nanoseconds!. That takes Team GB to three in number, roll on next month, I can’t wait!

2012 Kayak Angler’s Choice Awards Winners

YakAngler has just completed tallying up the votes from the second annual Kayak Angler’s Choice Awards. There were several categories within the awards, varying from best fisherman to best retailer. They also had a category for the ‘Blog of the Year’.

Congratulations to Rob Choi for taking a well deserved first place in the blog category and to Jason Self as runner up. Surprisingly I managed to pick up third place!. Many thanks for all those who took the time to vote and well done to YakAngler for promoting the sport and providing recognition to those who put in the effort, whether it be fishing, retailing, manufacturing, blogging, organising tournaments, etc.

Hobie Outback – ST Turbo Fin upgrade

The fins of the Hobie Mirage Drive can be upgraded with off the shelf upgrade kits supplied by Hobie. There are two options, the ST fin and the ST Turbo fin upgrade. The ST Turbo Fins are the largest fin offering increased torque, higher top speed as well as reduced peddling effort for a given speed. The ST Fins provide an improvement somewhere in between the standard fins and the ST Turbo fins. I’ve paddled Outbacks fitted with standard fins and ST Turbo fins and the difference in performance is rather large to say the least!. The ST Turbo fins also provide increased pedal resistance which I personally prefer. The Outback I received from the Hobie Centre came fitted with standard fins, though they sent me a ST Turbo upgrade kit in the post and I was eager to get my Mirage Drive upgraded ASAP!

The kit consisted of two ST Turbo fins, two new masts and a tube of Loctite. There was also a set of comprehensive instructions and the only tool potentially required is a set of vice lock pliers (Mole grips).

OLYMPUS DIGITAL CAMERA  OLYMPUS DIGITAL CAMERA

This kit was for the Version 2 (V2) Mirage Drive. The Version 2 was introduced in 2009 and has threaded masts as opposed to the V1 version whose masts were retained with a set screw. The Version 2 is easily identified by a V2 mark on the mast hole mount as shown below.

OLYMPUS DIGITAL CAMERA

The first task was to remove the small split ring that retains the clevis pin that secures the upper rear part of the fin. Depending on the length and strength of your nails this is achievable without any tools, though a small instrument screwdriver or plier may prove useful. With the split ring removed the clevis pin can be pushed out and the fin will slide down off the mast. This process is then repeated for the other fin.

OLYMPUS DIGITAL CAMERA

OLYMPUS DIGITAL CAMERA  OLYMPUS DIGITAL CAMERA

OLYMPUS DIGITAL CAMERA

With the standard fins removed it’s interesting to compare them to the ST Turbo fins, the ST Turbo fins being considerably longer. They appear to be manufactured from a somewhat softer material. I’ve read that minor damage to these fins can be repaired using a soldering iron, always handy to know should the need ever arise.

OLYMPUS DIGITAL CAMERA  OLYMPUS DIGITAL CAMERA

The next job was to remove the masts. These are tightly fitted into their sprockets and secured with loctite. The V2 masts have a flattened portion at the base of the mast to enable a pair of vice grips to be used to twist and unthread the masts from the sprockets. A little effort was initially required to break the loctite bond, though after that they unscrewed without issue. In a worst case scenario a vice may be required to aid removal.

OLYMPUS DIGITAL CAMERA

OLYMPUS DIGITAL CAMERA

The ST Turbo masts are longer items and after applying a small amount of loctite the new masts were screwed all the way into the sprockets and seated tightly using the vice grips.

OLYMPUS DIGITAL CAMERA  OLYMPUS DIGITAL CAMERA

With the masts securely fitted the new ST Turbo fins can be fitted onto the masts. The ST Turbo fins feature a claw tension screw, once the fin is fitted this screw can be adjusted to ‘tune’ the performance of the ST Turbo fin. The split pins and clevis pins are best removed prior to fitting the new fins.

OLYMPUS DIGITAL CAMERA

As the new fins are slid onto the masts take care to orientate the upper mounting block to allow the rear upper side of the fin to mate correctly and that the clew tension fitting aligns with the mounting block.

OLYMPUS DIGITAL CAMERA

OLYMPUS DIGITAL CAMERA

With the new fins correctly positioned the replacement clevis pins and split rings can be fitted into place.

OLYMPUS DIGITAL CAMERA  OLYMPUS DIGITAL CAMERA

The claw tension screw can now be adjusted to suit the peddlers personal requirements. By having more tension in the fins they become stiffer and faster with more resistance on the pedals. With reduced tension the offer more torque and less resistance on the pedals. Turning the screw up towards the mounting block tightens the fits, turning it away loosens the fins. It’s probably worth looking on the internet regarding ST Turbo fin tuning as they are varying opinions on how these fins are best set.

The whole process from start to finish took approximately 30 minutes, I’ll take it out on the water this weekend to test the fins. I took GPS speed data whilst using the standard fins so I’ll be able to provide an accurate comparison.

OLYMPUS DIGITAL CAMERA  OLYMPUS DIGITAL CAMERA

Here’s a video I found on You Tube that covers the installation, I saw little point in making a video when there are already several out there on the web.

Video produced by HobieKayakTech

Hobie Outback - Anchor trolley installation

It’s been quite a while since I’ve had a ‘blank canvas’ to work with. I’ve rigged several kayaks in the past few years, though it’s been a couple of years since my last rigging exercise. I’d received a Hobie anchor trolley kit from the Hobie Centre in Poole and was eager to get to work. An anchor trolley permits the user a lot of control whilst using an anchor, drogue or stake out pole. The direction of the kayak can be positioned to suit the weather, tide or the anglers particular requirements.

The kit itself is comprehensive with a decent set of instructions, though these can be tweaked to suit a particular model of kayak.

4  5

I should point out that it’s a universal kit as are in instructions. A good amount of thought needs to be given as to how best to position the various items of hardware. When it comes to drilling holes in a kayak it’s very much a case of think several times prior to drilling, mistakes are not always easy to rectify!

Both sides of the Hobie Outback are very similar, with regards to fitting an anchor trolley it’s a case of use the side which best suits the individual. I went with the left hand side as it’s the side I’ve anchored from for the past five years, no need to change something just for the sake of it.

3

The kits comes with two pulley blocks, one to be positioned forward, the other aft. Ideally the blocks should be positioned as far forward and aft as reasonably possible, normally within 12” of the bow and stern. This allow the kayak to lie ‘correctly’ with the tide when anchored. With the pulleys mounted further inboard, the kayak will tend to lie slightly across the tide. It’s always advisable when drilling holes to place them above the waterline. As much as I always apply suitable sealant to any hole there’s no point in tempting fate. If a seal fails and a leak occurs, water ingress will be minimised when positioned above the waterline.

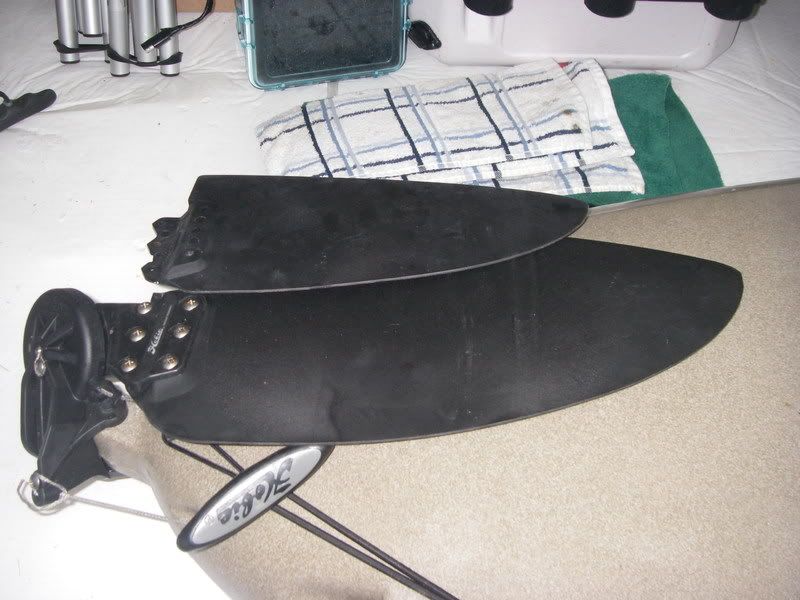
Quite of a lot of the fittings on the Hobie are screw-in fittings, in the case of the later Outback models this includes the paddle holders.

The paddle holder fittings can be removed by simply unscrewing them. One was easy to remove, the other proved to be rather difficult, though it was quickly removed with the careful use of some vice grips.

6

7  8

The kits comes with two screw-in pad eyes which are fitted in lieu of the fitting just removed. These take seconds to fit and provide a very neat finish.

9  10

I really cannot stress enough the importance of trial fitting the trolley and your proposed location prior to drilling holes and affixing the hardware to the kayak. I used strips of black masking tape to hold the pulleys in place whilst trying out a few potential mounting options. I finally settled on a locations for the pulleys and the drill was finally powered up!

With the rear pulley positioned, I drilled the first hole straight through the pulley mounting hole, loosely fitting the first bolt on completion. With the first bolt holding the pulley in place the second hole was drilled through the pulley mounting hole. This ensures that both holes are accurately drilled.

11

The photo above was quickly taken for illustration purposes only, for the eagle eyed folk out there, I am indeed holding the pulley back to front!. With a small amount of sealant (I used Marine Goop) applied to the mounting holes the pulley was fixed in place using the nylon locknuts, bolts and oversized washers supplied in the kit.

12  13

14

Should access to the bow or stern of the kayak be too difficult to permit the use of nuts and bolts the Well Nuts supplied with the kit can be used. This wasn’t an issue on the Outback as this particular model has a large round hatch at the rear and a large forward access hatch. I’m personally not a fan of Well Nuts and was pleased that they weren’t required.

The same procedure was repeated for the front pulley and within five minutes it was bolted in place.

15

The trolley line was then threaded through the pulleys and screw-in pad eyes. The lower trolley line passed through the screw-in pad eyes fitted earlier. The upper line is the main control line and features a stainless ring to which I can attach my anchor setup as required. The kit comes with a plastic hook, though I prefer a stainless ring, personal preference at the end of the day. A length of supplied bungee cord was fitted to one side of the stainless ring, this ‘softens’ the effects of the kayak riding in a swell and reduces the likelihood of these movements pulling the anchor free whilst providing a more comfortable experience for the angler.

20

I’d purchased a zigzag cleat and incorporated this into my trolley design. It’s an  important piece of kit when anchored in tide. If the trolley inadvertently moves whilst anchored in a strong tide there’s the potential for the kayak to become unstable and potentially capsize. The zigzag cleat allows the trolley to be suitable locked in the required position. The cleat itself is rather bulky to be honest and I’ve broken one before whilst loading a kayak on the roof of my car. The Hobie Outback features recessed storage on either side of the cockpit area so I chose to mount my cleat in the forward recess. Access to the ‘up’ rudder toggle isn’t particularly obstructed when the trolley line is locked off, though to be honest there’s no reason to use the rudder toggle when anchored.

16

With the pulleys positioned well forward and aft the upper control line had a strong tendency to ride up the side of the kayak and encroach into the cockpit area. I found that rather annoying and untidy so I fitted a bungee button in between the screw in pad eyes to provide a neater solution.

22

That effectively completed the anchor trolley installation. I’ve ordered an aluminium cleat which I’ll position forward in the cockpit to aid anchor recovery in a strong tide, though I’ll cover that in a short article sometime soon. Below are a few ‘before & after’ photos of the completed anchor trolley installation, fitted to suit my own taste. There are of course various design possibilities, though it’s worth taking your time, thinking of you requirements, sitting in the kayak and testing out your chosen design before taking the plunge and bolting everything in place.

‘Before & after’ photos

3

25


1

24


2

21